Using Airtable as a Jamstack CMS

Recently, I designed and built a personal portfolio site for a musician and composer (check it out here!). As a small “marketing” site, it was the perfect Jamstack project, and for that reason I used the phenomenal Astro static site generator while pulling in some Headless UI components for minimal interactivity.
But early in the project I hit on a problem that ironically seems to crop up for just this kind of perfect Jamstack scenario: how to enable the (individual, maybe not super tech-savvy) client to manage content in the easiest, most pleasant, and most cost-effective way? Given the simplicity of the overall site, it’s a much thornier question than you’d expect.
This post is a brief overview of how I used Airtable to solve this problem for this specific kind of small portfolio website, which led to some interesting results.

The Problem
Markdown, while great for structuring content for blogs like this one, is in my opinion just not as versatile for managing content for such a portfolio project as a more traditional CMS might be. I wanted to easily scaffold a number of different content types (testimonials, projects, compositions, events, credits, etc.), and, while technically possible in Markdown, this would not have been ideal for client editing. It would be quite a hard sell to get a client with little web experience beyond Squarespace or WordPress to start using a text editor to make content changes locally and then push changes to a code repository. There are a few Git-based “Markdown CMS” options that exist which theoretically address this problem, but I don’t find them terribly impressive or intuitive (at least I’ll say that for Netlify CMS, an absolute wreck, although Tina CMS in conjunction with static site generation looks promising for future experimentation).
I had the pleasure of attending the Jamstack Conference in October (it was fantastic!), and something I overheard there rang true in my experience—that as the industry moves away from WordPress (which still powers a huge portion of the web, by the way), the use-case that WordPress was perfectly tailored to (namely, the personal/portfolio site of the type I’m talking about here) has been overlooked by most of the big-name, cutting-edge technologies.
For example, there is an amazing crop of headless CMS options out there at the moment, although most are geared toward enterprise users. I’ve had a lot of fun learning and playing around with Sanity and Storyblok in particular, but for the small personal portfolio site that WordPress excelled at, both feel a bit like bringing a Lamborghini to a go-kart track. The headless CMS space and its products are still evolving, so one day soon this might not seem like such a big deal. But WordPress was (is) unbelievably popular because, apart from any development considerations, it addressed this need for a simple, “plug-and-play” content solution with minimal customization and ease of editing for the non-technical user.
It was as a result of these problems and thoughts that I decided to try using Airtable as a content management system for this particular portfolio project—not an original idea by any means, but one that I had wanted to try my own way given the considerations above. Airtable, if you’re unfamiliar, is a kind of collaborative spreadsheet-database hybrid; it gives you all of the functionality of shared Excel sheets with the power of linked records and organizational methods you’d expect in a database. It’s a beautiful and intuitive product that I use regularly for my own work and personal needs. It also provides a straightforward, REST-like web API that allows the data you create to be used anywhere on the web.
So here’s how I set up an “Airtable back-end” for this personal portfolio site—a back-end that happens to be incredibly easy for a client to set up, use, and maintain (at no charge!). This approach offered a number of benefits and some minor drawbacks—for example, it would probably become a nightmare if you had more than a few dozen records in each table—but overall I think it’s a great solution for that small Jamstack site where you need a no-nonsense, easy-to-edit content solution.
Airtable: Scaffolding the Data
Getting set up in Airtable is quick and easy. First, I created a “base,” which is the central hub for a project that can contain multiple tables and users related to that project (helpful because you can work in real-time on structuring and adding content with your client). From there, I added separate tables corresponding to each page or content collection type. For example, the “Pages” table has some recurring fields for each of the website’s pages, like a title, subtitle, featured image, SEO description, etc., while the “Credits” table is structured to show a content collection with information like year, role, image, and IMDb link for movie and TV credits.
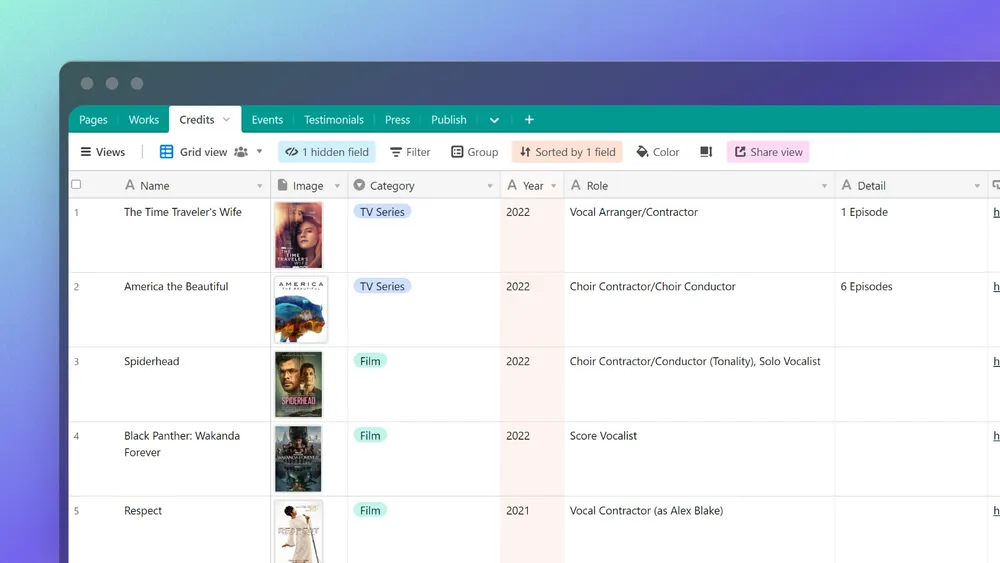
What I love about Airtable is that these tables are super fast to set up, and setting data types for each field is painless. Just like a headless CMS, there is a large variety of types to select from, from strings to multiple attachments to rich text to custom formulas. The table editor is also completely decoupled from the data fetched on the front-end, so it’s possible to sort and filter the data here without it effecting anything you’re doing with it elsewhere (again, useful for content editors who might want to customize the experience here without breaking anything on the live site).
JavaScript: Getting the Data
For fetching the data on the front-end, I decided not to use the official Airtable JavaScript client because I simply didn’t need all the functionality; if you’re not needing to do real-time record selection or app-like CRUD operations, then you can use a much simpler fetch function with Airtable’s web API. For situations like this, I’m a big fan of the Eleventy Fetch plugin, which you can use on its own in any framework. In this case, fetching the data will happen at build time, making it fully compatible with a static site generator like Astro or Eleventy.
Here’s an example of an asynchronous function that grabs an array of records from a given table, and accepts sorting and filtering parameters when called. For a static site where you might just need to have one set of the sorted and filtered data ready at hand, I found this to be ideal. (Following Astro’s project architecture, the example below is from a file of Airtable helper functions that lives in the /src/utils directory.)
import { default as EleventyFetch } from "@11ty/eleventy-fetch";

// Setting the Airtable secret API key and the Airtable base id
// from environment variables
const airtableToken = import.meta.env.AIRTABLE_API_KEY;
const airtableBaseId = import.meta.env.AIRTABLE_BASE_ID;

export async function getRecords(table, sortField, sortDirection) {
  // Constructing a query URL (using the Airtable API URL encoder
  // here: https://codepen.io/airtable/pen/MeXqOg) and
  // adding in our filter and sort parameters
  let url = `https://api.airtable.com/v0/${airtableBaseId}/${table}?sort%5B0%5D%5Bfield%5D=${sortField}&sort%5B0%5D%5Bdirection%5D=${sortDirection}`;

  // The beauty of Eleventy Fetch -- pass in our URL and
  // set a few options for caching and authorization
  const response = await EleventyFetch(url, {
    // Cache the responses for 1 hour; useful so you don't
    // constantly ping and exceed the limits on Airtable's API
    duration: "1h",

    // Set the data response type
    type: "json",

    // Append the Airtable API authorization key to the query
    fetchOptions: {
      headers: {
        authorization: `Bearer ${airtableToken}`,
      },
    },
  });

  let { records } = await response;
  return records;
}
The function will return an array of objects from our specified Airtable table, which we can use in our page and component templates. For the “Credits” table, the JSON data will look something like this:
[
  {
    id: 'some id',
    createdTime: 'some date',
    fields: {
      Name: 'The Time Traveler's Wife',
      Year: '2022',
      Category: 'TV Series',
      Role: 'Vocal Arranger',
      Detail: '1 Episode',
      Link: 'www.imdb.com/title/tt8783930',
      Image: [Array],
      ImageAlt: 'Poster for TV show The Time Traveler's Wife'
    }
  },
  {
    id: 'some id',
    createdTime: 'some date',
    fields: {
      Name: 'Space Jam: A New Legacy',
      Year: '2021',
      Category: 'Film',
      Role: 'Choirmaster',
      Detail: '',
      Link: 'www.imdb.com/title/tt3554046',
      Image: [Array],
      ImageAlt: 'Poster for film Space Jam: A New Legacy'
    }
  }
]
To render the data, I call the function on a given page, making use of Astro’s front matter to import and set variables specific to that page. In this example, I’m also using a “Credit” Astro component, which both accepts props and creates slots to server-render child content—in this case the credits data we’re getting from the getRecords() function call:
---
import { getRecords } from "../utils/airtable";
import { getCategoryStyle } from "../utils/helpers"
import Credit from "../components/Credit.astro";

let tableId = 'Credits'; // Can be the name or unique ID of the Airtable table

// Arrange the records by the 'Year' field in descending order
// and save to a variable
const credits = await getRecords(tableId, 'Year', 'desc');
---

// When mapping over the credits array, first I'll use object
// destructuring to make accessing the properties more easily accessible
// Airtable's image field is an array, so to get the
// image source we can access the first index of the array
// Finally, I'll use a custom helper function that assigns unique CSS classes
// based on an item's category input
<h2>Credits</h2>
<div class="slider">
    {credits.map((item) => {
        const { fields } = item;
        const imageSrc = fields.Image[0].url;
        return (
          <Credit
              href={fields.Link}
              imageSrc={imageSrc}
              imageAlt={fields.ImageAlt}
              categoryName={fields.Category}
              categoryStyle={getCategoryStyle(fields.Category)}
          >
            <h3>{fields.Name}</h3>
            <div class="details">
              <p class="cluster">
                {[fields.Year, fields.Role].join(' • ')}
              </p>
              <p><em>{fields.Detail}</em></p>
            </div>
          </Credit>
        );
    })}
</div>
On the live site, the rendered and styled output looks like this (using a somewhat outdated slider powered by Flickity):

A note on images
Airtable recently announced that the URLs for attachments will now expire after “a couple of hours.” For this reason (and general performance considerations), it’s not a good idea to use the image links provided by Airtable directly in your markup or to treat Airtable as a “hosted service” for images/attachments. Instead, use something like the Astro or Eleventy image plugins when dealing with Airtable images, both of which will, among other things, convert an external source URL to a local image(s) at build time, according to your specifications.
---
import { Image } from "@astrojs/image/components";
const { href, imageSrc, imageAlt, categoryName, categoryStyle } = Astro.props;
---
// ...
// Other component markup
// ...

// For external images, width and height or one value plus aspect ratio required
<Image src={imageSrc} width={900} aspectRatio='10:16' alt={imageAlt} format="webp" />
Airtable Interface: Editing the Data
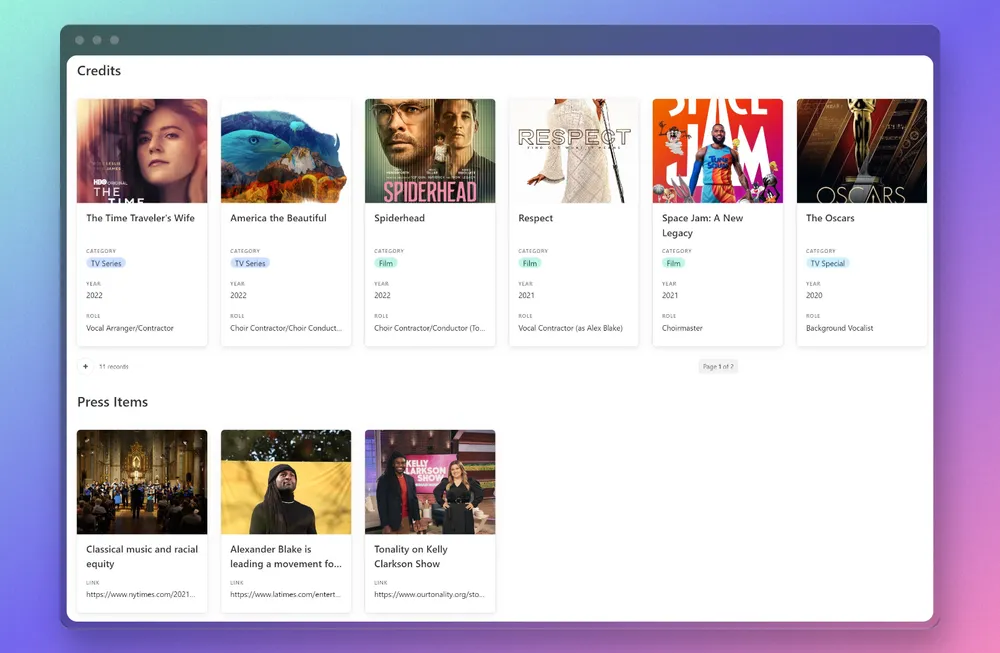
Now this is the part where it gets really exciting. While it’s possible to just leave things here and have a basic content management system that can integrate with any front-end, Airtable also offers an interface designer that allows you to repurpose your table data into custom visual interfaces. What this means is that you can effectively recreate a CMS “dashboard” within Airtable that makes the client editing experience even smoother.
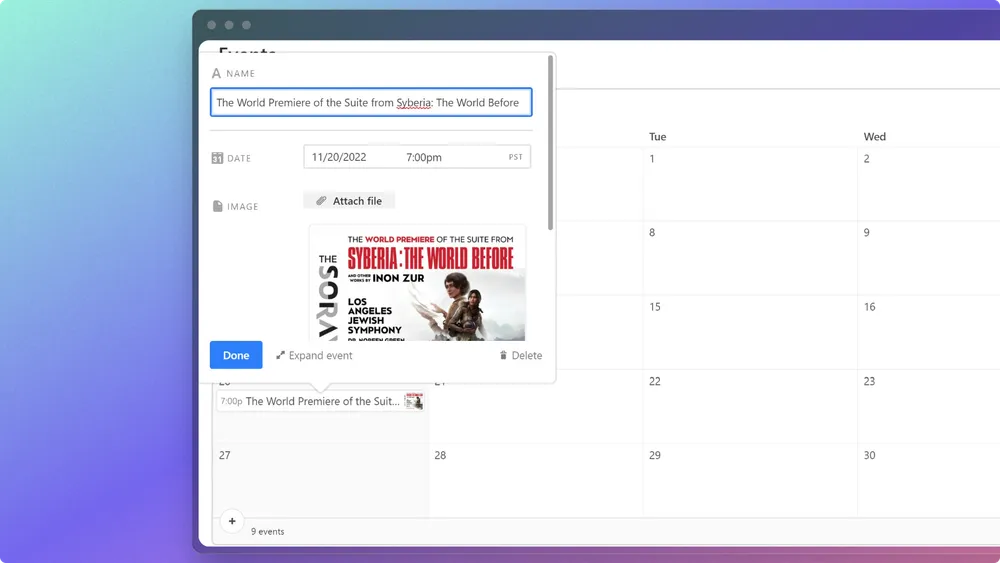
Back in Airtable, I set up an interface that breaks out the various tables into “content collections,” which all show up on one dashboard. The records are shown as these nice little cards (with customizable preview fields), and editing a record is as easy as clicking into one and changing a field. It’s even possible to use different visual widgets for different data types (i.e., a calendar widget for event records—super cool!).
Publishing
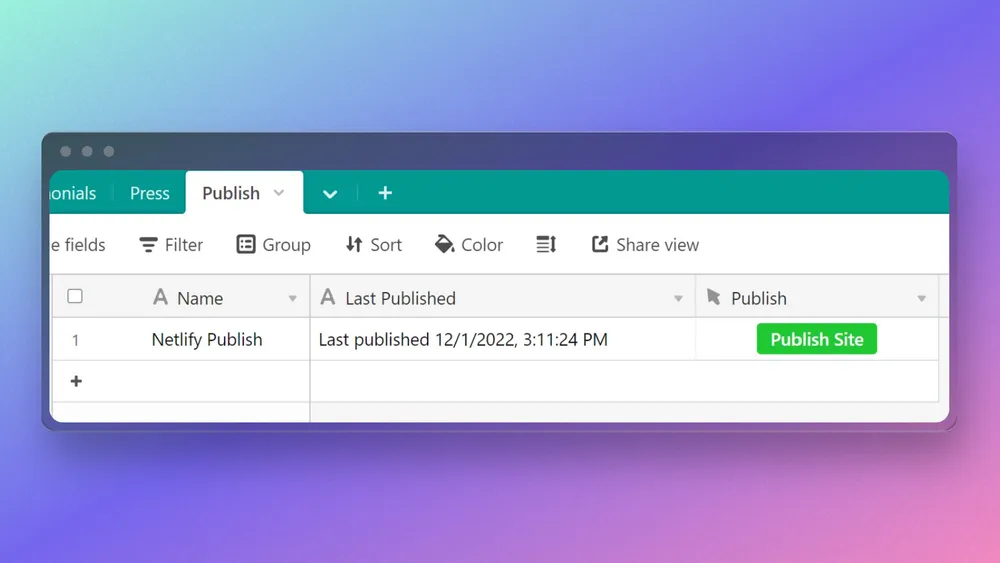
Publishing the site from within the interface itself is the one drawback to this approach. Unfortunately, on the free Airtable plan you can’t trigger scripts in an interface, so I’m not able to use a webhook to publish the site from my “dashboard.” It’s a minor (and understandable) annoyance, but it means that I have to have the client return to the table editor and click a button to run the build script, which isn’t as seamless as I’d like it to be. Still, pretty cool that you can deploy the site with a click of a button from within Airtable.
Here is how I set this site up to deploy to Netlify using a custom build hook. I added a new table in my base called “Publish,” where I have one record that uses the Airtable scripting extension to run the hook when the “Publish Site” button is clicked.
The Airtable scripting editor is a bit idiosyncratic, but it’s straightforward enough to implement a build hook like this:
// Unique webhook URL from Netlify with a title appended (which will
// show up on the Netlify deploy report)
let webhookUrl = `https://api.netlify.com/build_hooks/${UNIQUE_NETLIFY_ID}?trigger_title=Airtable+Publish`;

// Options that set the fetch parameters for the webhook
let requestOptions = {
  method: "POST",
  redirect: "follow",
};

// Construct the function that will send the webhook when the
// publish button is clicked
let publishToNetlify = () =>
  fetch(webhookUrl, requestOptions)
    .then((response) => response.text())
    .then((result) => console.log("Published!", result))
    .catch((error) => console.log("Failed to publish", error));

// Call the function: site rebuilt on Netlify with one click!
publishToNetlify();

// Optional: update a field in the Publish table that
// lets us know when the last publish time was

// Get current datetime
let publishTime = new Date().toLocaleString();

// Select the record field to update
let table = base.getTable("Publish");
let query = await table.selectRecordsAsync({ fields: [] });
let recordId = query.records[0].id;

// Print text to the selected field: in this case, the
// last published date and time
output.text(`Last published ${publishTime}`);
await table.updateRecordAsync(recordId, {
  "Last Published": `Last published ${publishTime}`,
});
So that’s how I built out an Airtable CMS in less than an hour. I’m eager to keep exploring new ways to build Jamstack sites with Airtable and other tools. If you’ve done anything similar or have ideas on how this could be improved, feel free to let me know!